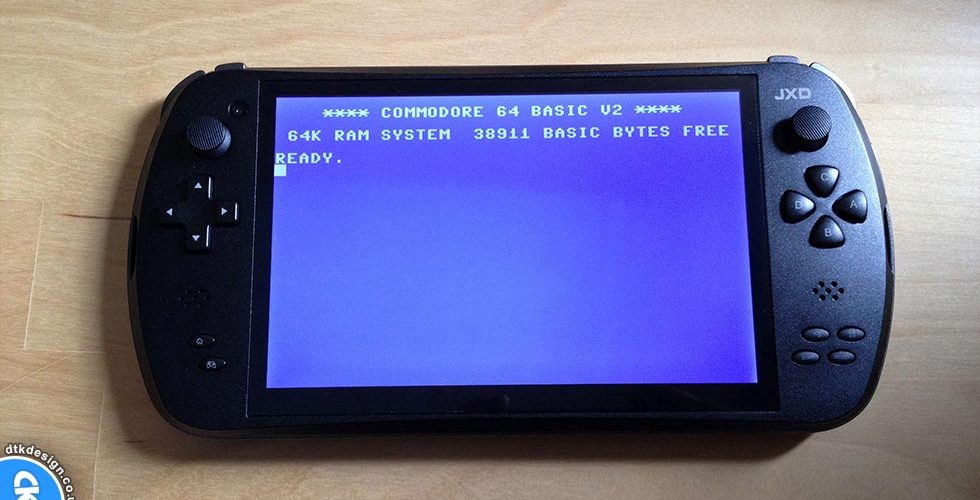
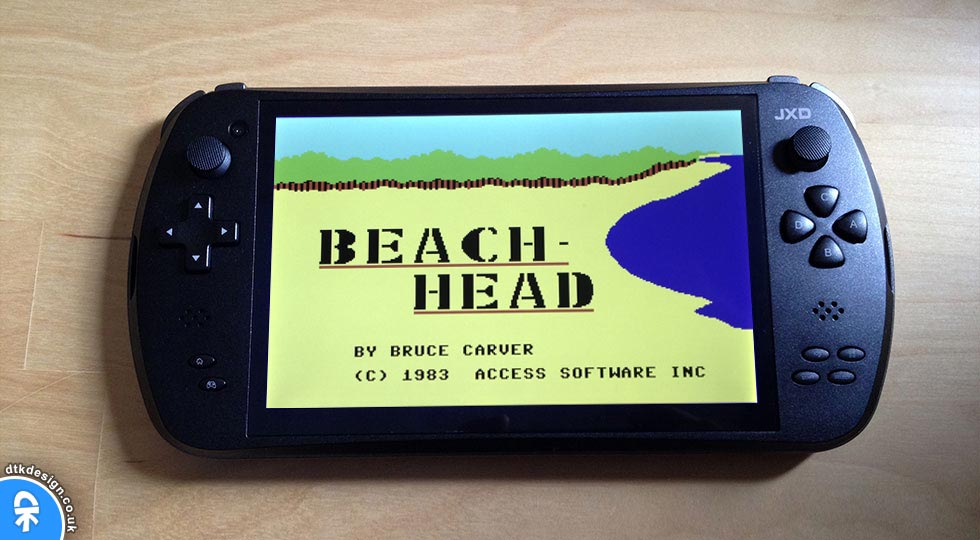
A couple of weeks ago, I posted on Twitter that I had successfully got a Commodore 64 emulator up and running on my JXD 7800b Android tablet gaming device.
This happened to generate a lot of interest from retro gamers and fellow JXD 7800 owners asking me how I achieved this, so I thought I would make this step-by-step guide on what I did to get a Commodore 64 emulator up and running on my JXD 7800b.
Downloading the C64 Emulator
The first step is to actually download a C64 emulator to your JXD 7800 Android device. I did this by accessing the Google Play Store from my JXD 7800 and searching for “commodore 64 emulator”.
A number of applications appear in the search but the one I chose to use was a application called AnVICEx64 by a company called Locnet. I’m not saying this is the best C64 emulator, I’m not saying it’s the worst, it’s just the one I chose to use therefor in this tutorial I will be showing you how to setup and use AnVICEx64.
- 1.1. Download AnVICEx64 to your JXD 7800 device (this app is not free, but it’s not expensive either. You will need to purchase it).
Downloading the ROM files
Because AnVICEx64 does not ship with the kernal files, we need to source them from elsewhere. Luckily, there is a desktop version of AnVICEx64 called VICE which does ship with the kernel files, and it’s FREE.
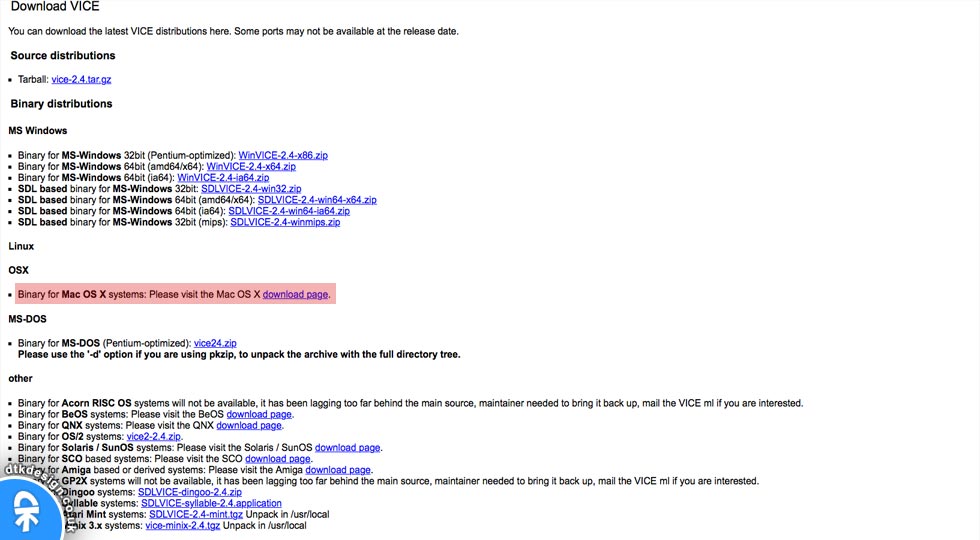
- 2.1. Navigate to the VICE website, then select the Download option from the navigation menu.
- 2.2. From the VICE Download page, select the download option for your current OS (not the JXD OS, your computer OS). In my case, I selected OSX as I am using a Mac.
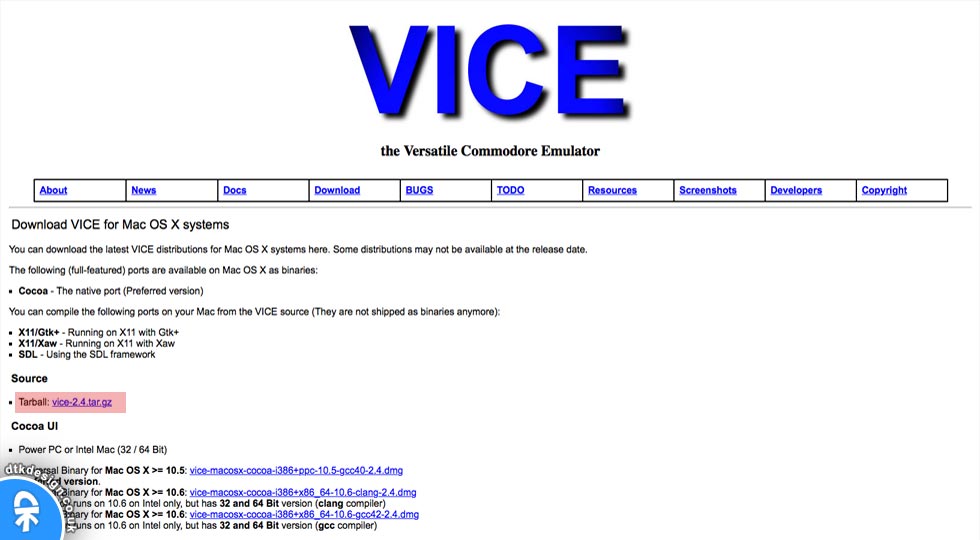
- 2.3. When the OSX Download page appears, select to download the Tarball: vice-2.4.tar.gz compressed file.
Setting up your SD Card
We now need to setup the SD Card and install the ROM files onto it so the C64 emulator we downloaded in Step 1 will work.
To do this, insert your SD Card into your computer and open it so you can write to it. If you can not access the SD Card, you may need to format it first. If you can not write to the SD Card, make sure to do not have the card ‘locked’ in the SD adaptor.
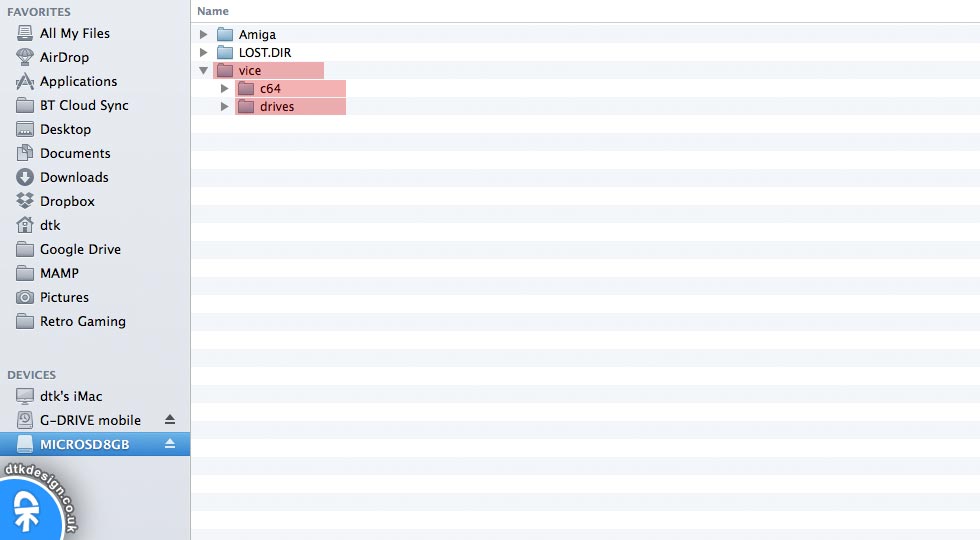
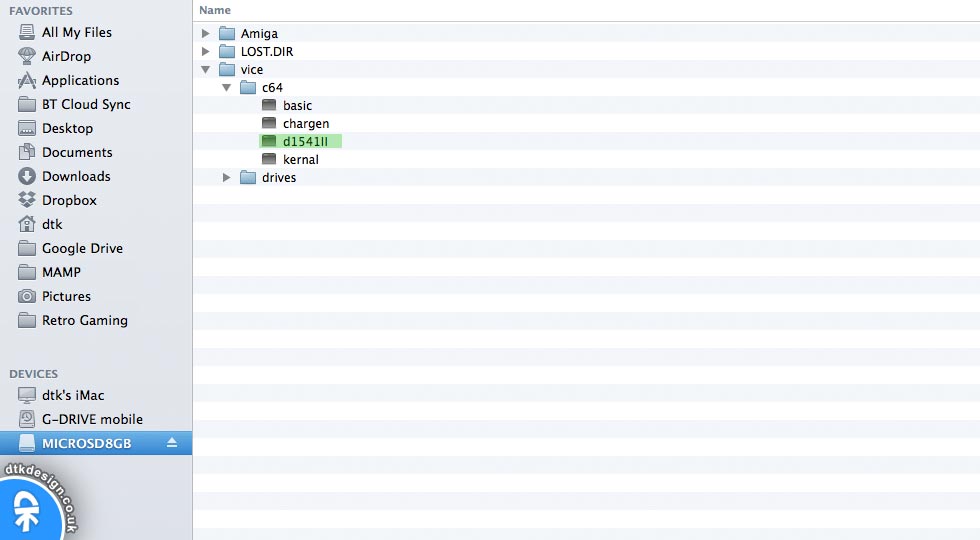
- 3.1. Create a new folder on the SD Card and name it ‘vice’ (without the quotes). Inside the ‘vice’ folder, create two more folders and name one ‘c64’ (without quotes) and name the other ‘drives’ (without quotes).
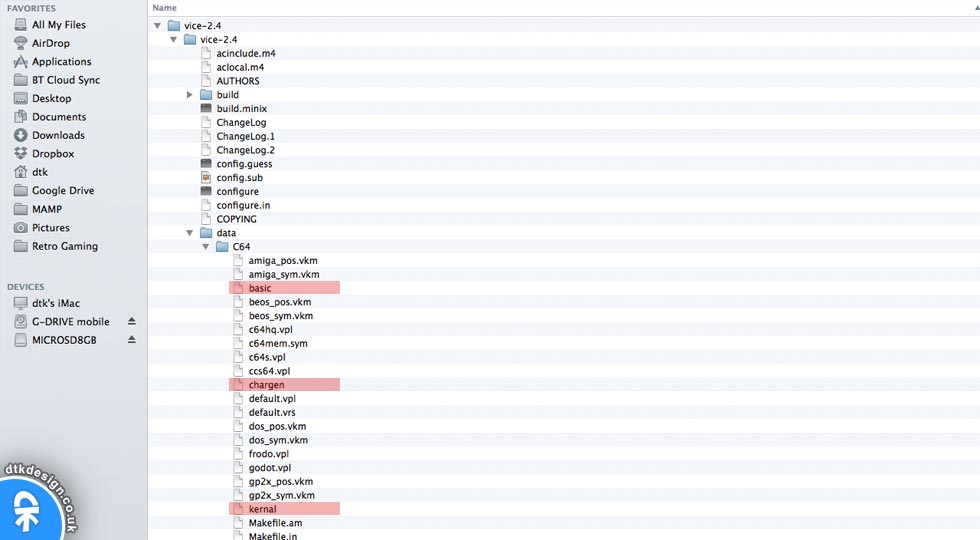
- 3.2. Unpack the VICE program we downloaded in Step 2 and navigate to the vice-2.4 > vice-2.4 > data > C64 folder. In this folder you will find the following files:
– basic: The Basic ROM file.
– chargen: The character generator ROM file.
– kernal: The Kernal ROM file.
- 3.3. Copy the basic, chargen and kernal files to the c64 folder on your SD Card.
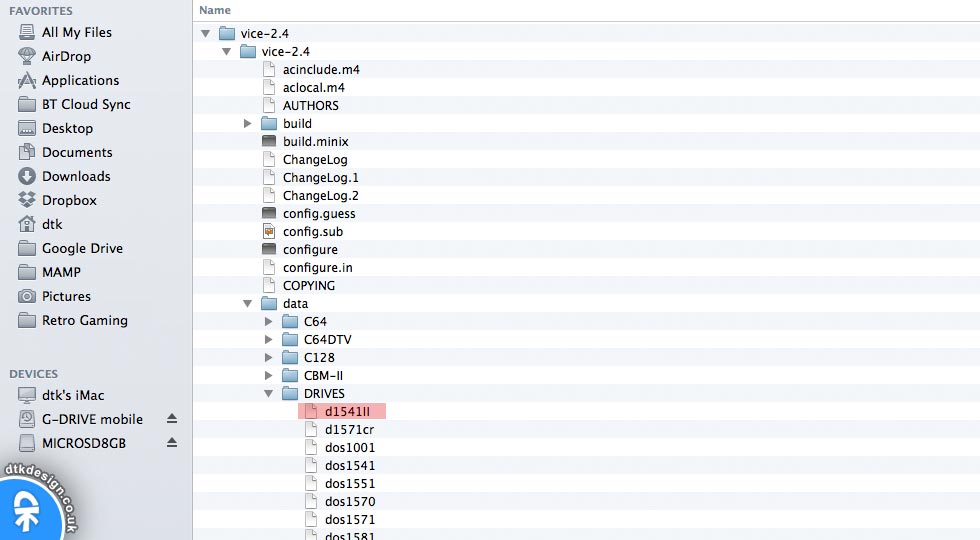
- 3.4. Next, go back to the VICE program and navigate to the vice-2.4 > vice-2.4 > data > DRIVES folder. In this folder you will find the following file:
– d1541II: The Drive ROM file.
- 3.5. Copy the d1541II file to the c64 folder on your SD Card.
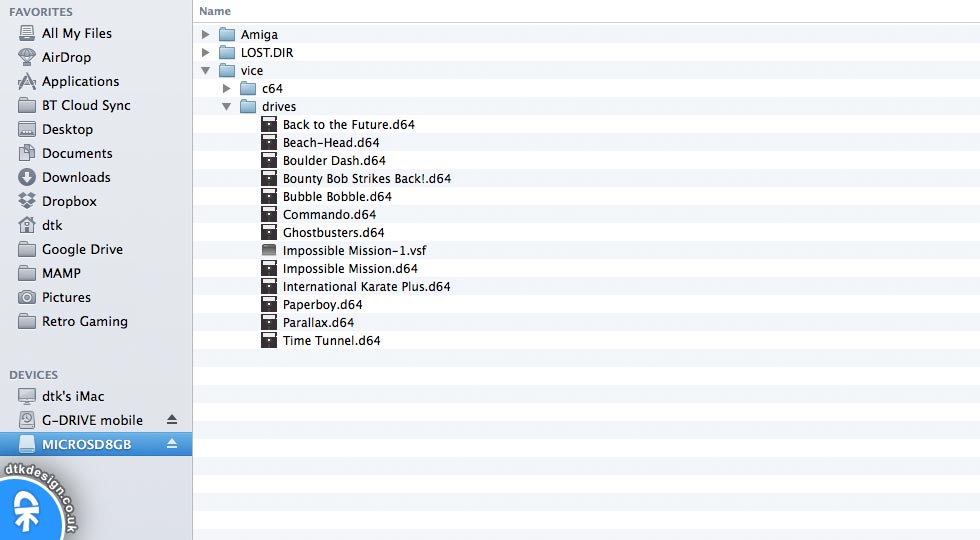
That’s the emulator ROM files all set up. The only thing left to do is populate the ‘drives’ folder on your SD Card with Commodore 64 game ROM files that you want to play.
- 3.6. Copy your Commodore 64 game ROM files to the drives folder on your SD Card. There are two types of Commordore 64 game ROM files, both will work with the AnVICEx64 emulator.
– .t64: Commodore 64 tape ROM files.
– .d64: Commodore 64 disk ROM files.
Making it all Work
The last thing we need to do is to setup the AnVICEx64 app with the ROM files so you can start retro gaming! Eject your SD Card from your computer and insert it into your JXD 7800.
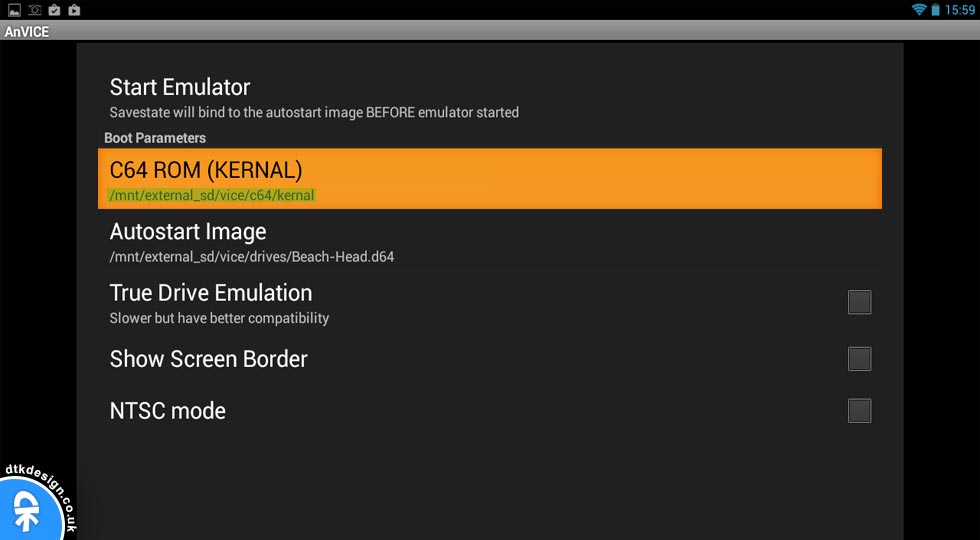
- 4.1. Open the AnVICEx64 application on your JXD device and select the C64 ROM (KERNAL) option. You now need to tell the application where your c64 kernal ROM file is located on your SD Card.
- You need to be able to access your SD Card from root on your JXD device in order for this to work. So in my case, from root, I select mnt > external_sd > vice > c64 > kernal which becomes the file path /mnt/external_sd/vice/c64/kernal (see image above) because this is where my kernal file is located on my SD Card.
- Note: When you access the c64 folder to select the kernal file, you may see the basic, chargen, d1541II and kernal files listed twice. Once as ._basic, ._chargen, ._d1541II, ._kernal, and once as basic, chargen, d1541II and kernal.
- Select the kernal version (without the dot underscore).
- 4.2. Next, select the Autostart Image option. This is where you select the game ROM you want to play. You will need to navigate to the drives folder on your SD Card to access the game ROMs.
- Once again, from root I select mnt > external_sd > vice > drives. You should now see all your game ROMs listed here.
- Select the game ROM you want to play.
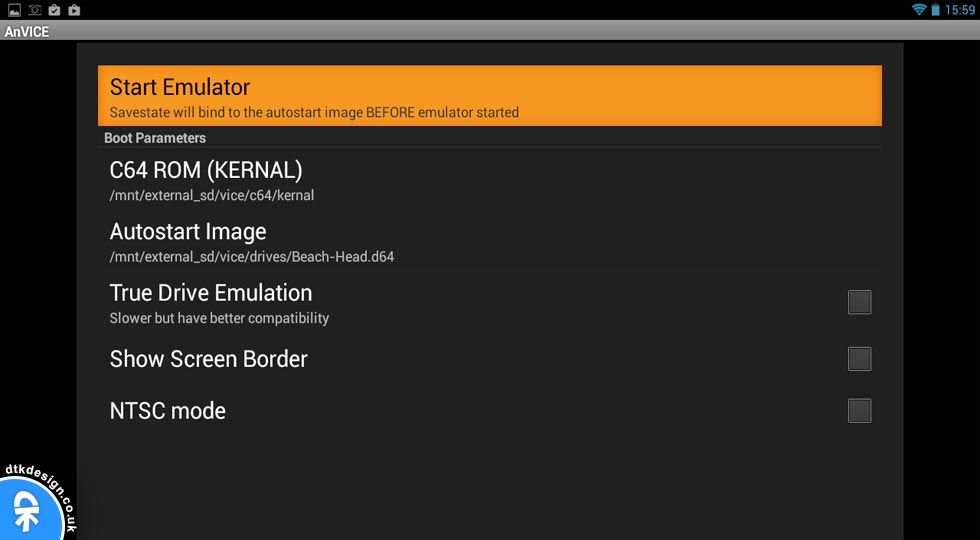
- 4.3. Finally, select Start Emulator to start loading the game.
Happy Retro Gaming!
That’s it! You should now be up and running with your Commodore 64 emulator on your JXD 7800b.
Happy retro gaming!





Finally all settings should be saved so that you don’t need to do them again everytime you call up the emulator. To do that hit the menu item
Hey, sorry for the late response.
I’m not sure I understand what settings are referring to here. Can you be more specific?